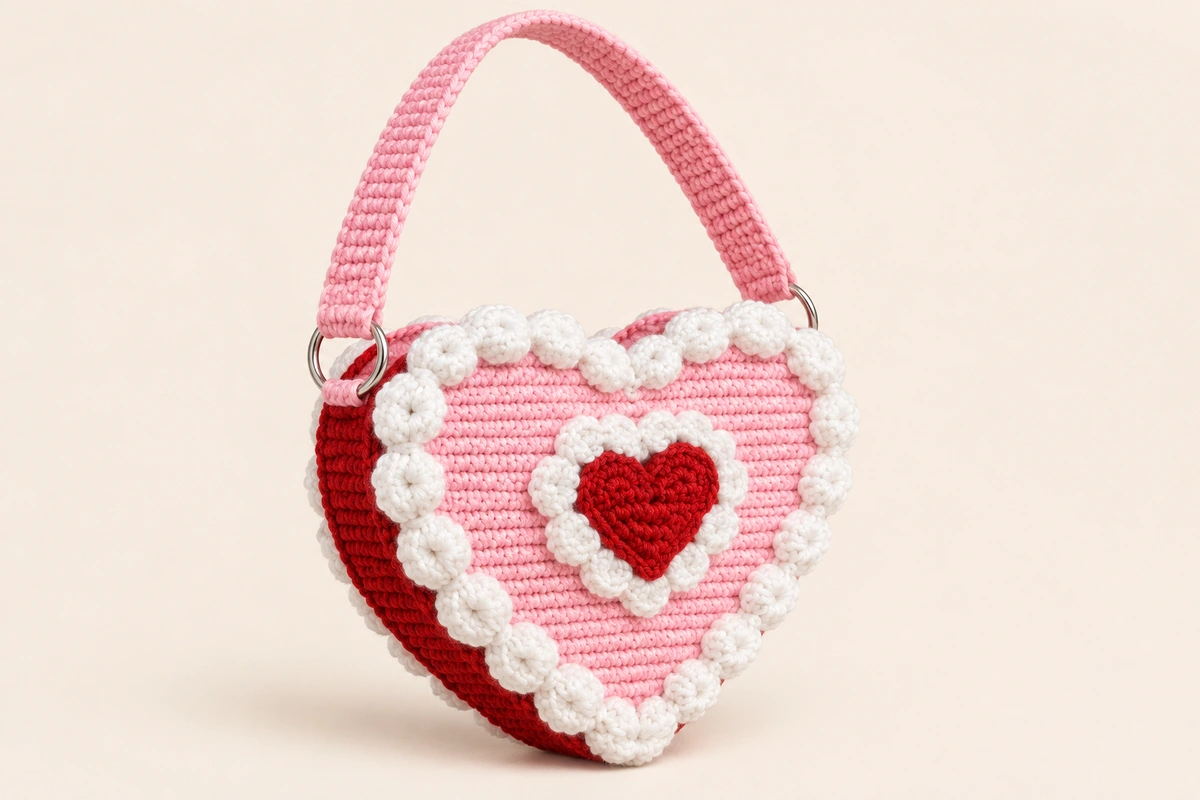
This pink crochet heart bag combines a pastel heart silhouette with white puffed edging, a red side panel, and a small red heart on the front. A long pink strap turns the little pouch into a shoulder bag for a phone, keys, and other light essentials. The raised white trim gives it the look of piped frosting.
Pattern status. This is an original crochet design draft inspired by the supplied reference image. It has not been test crocheted. Written stitch counts have been checked, but the fit, yarn quantities, and finished measurements still need sample verification. The illustrations are AI-generated visual concepts.
Jump to the Free Crochet Pattern ↓
Before You Start
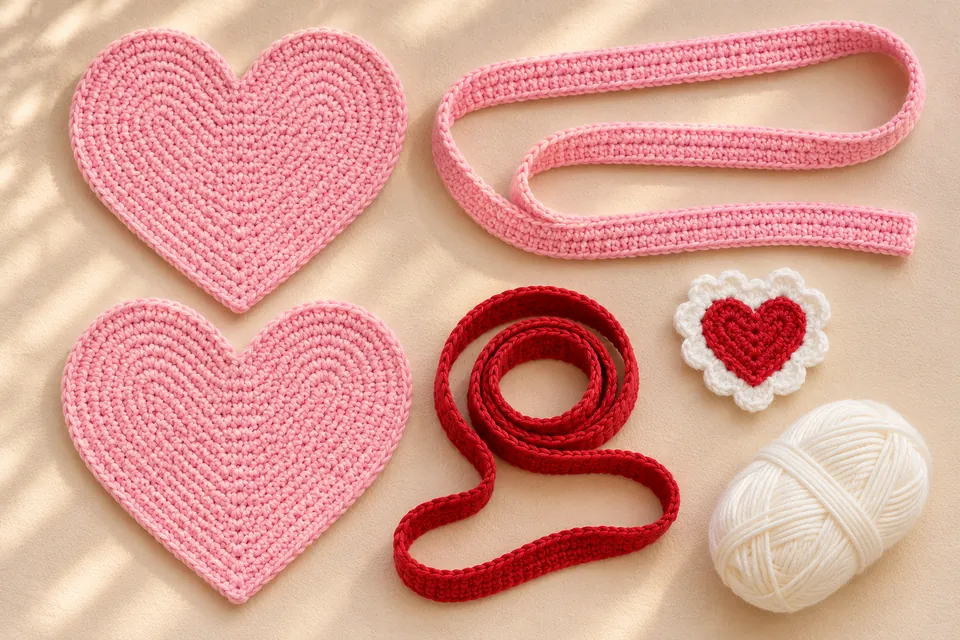
Make two flat pink hearts from the bottom point upward, splitting the last section into two lobes. A red strip joins the lower edges to create depth. Leave the upper lobes open for access and add a fabric lining, a small closure, and a pink strap.
The reference image has smooth pink panels that appear to show a different stitch texture. This version uses single crochet throughout the panels so you can make the bag with a crochet hook. The shaping and edging give an interpretation of the pictured style.
| Detail | Pattern information |
|---|---|
| Skill level | Intermediate, including shaping, sewing, lining, and a shaped gusset. |
| Terminology | US crochet terms. |
| Construction | Two row-worked heart panels, a red gusset, crocheted trim, and a reinforced strap. |
| Planning gauge | 18 sc and 20 rows per 4 in / 10 cm, measured flat. Adjust the hook after swatching. |
| Calculated size | About 22 cm / 8¾ in wide and 14.5 cm / 5¾ in tall before edging at the planning gauge. These dimensions are calculated, not sample measurements. |
| Gusset depth | Approximately 3–3.5 cm / 1¼ in before seams. |
| Strap | Made to a measured length. Suggested shoulder strap planning range is 70–85 cm / 27½–33½ in, including attachment tabs. |
Materials and Tools
Yarn and Hook
- DK cotton or a firm cotton blend in pastel pink, approximately 120–160 g as an unverified purchasing estimate for the panels and strap.
- White yarn of the same weight, approximately 50–75 g for the trim.
- Red yarn of the same weight, approximately 40–60 g for the gusset and applique.
- A 3.5 mm hook as a starting point, adjusted to get a dense fabric near the planning gauge.
Use the same yarn family for all three colors. Fiber, yardage per ball, strap length, and the amount of white trim can change consumption substantially.
Lining and Finishing Supplies
- Washable cotton lining fabric, roughly 40 × 50 cm / 16 × 20 in.
- Nonstretch woven tape approximately 1–1.5 cm wide to reinforce the strap, cut after measuring the finished strap.
- A small sew-on snap, needle, matching sewing thread, tapestry needle, scissors, measuring tape, and removable markers.
The lining supports small objects and stops them catching in the stitches. Check your phone against the paper template and opening before making both panels.
Stitches and Pattern Notes
| Abbreviation | Meaning |
|---|---|
| ch | Chain |
| sc | Single crochet |
| dc | Double crochet |
| tr | Treble crochet |
| sl st | Slip stitch |
| inc | 2 sc in one stitch |
| dec | Single crochet the next two stitches together |
| st / sts | Stitch / stitches |
| MR | Magic ring |
Ch 1 and turn after every row unless instructed otherwise. The turning chain does not count as a stitch. Work into the first actual stitch immediately after turning. Mark the first and last stitches when shaping.
White bobble. Yarn over, insert the hook into the specified stitch, yarn over and pull up a loop, yarn over and draw through two loops. Repeat this partial dc in the same stitch four more times. With six loops remaining on the hook, yarn over and draw through all six. Ch 1 to secure. The bobble counts as one worked stitch and its securing chain is excluded from the next round.
Gauge and Sizing
Make a swatch at least 24 stitches wide and 26 rows tall. Relax it using the yarn’s care method, let it dry flat, then measure the center 10 cm. At 18 sc per 10 cm, the 40-stitch panel width is about 22.2 cm. At 20 rows per 10 cm, the 29-row height is about 14.5 cm. Row gauge affects how tall the heart becomes.
For a roomier bag, use a thicker yarn and suitable hook, then measure your first panel again. Keep the written counts together and make both panels at the same tension. Recalculate the lining, gusset length, and strap for the new size.
Pink Crochet Heart Bag Pattern
Step 1. Crochet the Lower Heart Panels — Make 2
With pink, ch 2. In Row 1, work 2 sc in the second chain from the hook. You have 2 stitches. Ch 1 and turn.
For Rows 2–20, inc in the first st, sc in each st up to the last st, and inc in the last st. Each row adds two stitches. At the end of Row 20 you have 40 stitches. Do not fasten off yet.
| Row | Ending count |
|---|---|
| 1 | 2 |
| 2 | 4 |
| 5 | 10 |
| 10 | 20 |
| 15 | 30 |
| 20 | 40 |
Step 2. Shape Both Upper Lobes
Divide Row 20 into two groups of 20 stitches using a marker between stitches 20 and 21. Work the first lobe on the first group only. Ch 1 and turn between the following rows.
| Row | Instructions | Ending count |
|---|---|---|
| 21 | Sc in the first 20 sts of Row 20. Leave the remaining 20 unworked. | 20 |
| 22 | Dec, 16 sc, dec. | 18 |
| 23 | Sc across. | 18 |
| 24 | Dec, 14 sc, dec. | 16 |
| 25 | Dec, 12 sc, dec. | 14 |
| 26 | Dec, 10 sc, dec. | 12 |
| 27 | Dec, 8 sc, dec. | 10 |
| 28 | Dec, 6 sc, dec. | 8 |
| 29 | Dec, 4 sc, dec. | 6 |
Fasten off. For the second lobe, hold the panel with Row 20 horizontal and the first lobe on the right. Join pink to the first unworked stitch immediately beside the center split and work 20 sc toward the outer edge. This is its Row 21. Repeat Rows 22–29 above and fasten off. You have two matching lobes separated by a notch.
Repeat the entire panel for the back. Lay the two pieces together and check that their points, widest corners, and lobes match before continuing.
Step 3. Edge the Panels and Mark the Opening
With pink, join near one outer corner at Row 20. Sc evenly around each complete heart. As a starting distribution, work one sc in each row end down the sides, three sc around the bottom point, and one sc in each stitch across the lobe tops. Work one sc per row end around the lobe sides. At the center notch, work one sc into the base of the split and continue up the other lobe. Join to the first sc and fasten off.
Check that the edging lies flat. Add a stitch only where it pulls and remove a stitch where it ripples. Match the distribution on both panels. Mark the edging stitch at each outer Row-20 corner. The lower edge from one marker around the bottom point to the other marker is the gusset seam. The two upper lobes between those markers form the opening.
Step 4. Make the Red Gusset
Lay a flexible tape along the marked lower seam line without stretching the panel and record its length. With red, ch 7. Row 1 is 6 sc, beginning in the second chain from the hook. Ch 1 and turn. Repeat rows of 6 sc until the strip matches the measured lower seam length when laid on its side edge without stretching.
The strip’s long row-end edges will join to the pink panels. Stop and compare repeatedly near the end, since row gauge determines how many rows you need. Fasten off with a long sewing tail. At the planning stitch gauge, the six-stitch strip is roughly 3.3 cm wide before seaming.
Step 5. Crochet the Small Red Heart
Make a loose red MR. Into the ring work ch 3, 3 tr, 3 dc, ch 1, 1 tr for the bottom point, ch 1, 3 dc, 3 tr, ch 3, then sl st into the ring. Pull the center closed and secure it. There are 15 tall stitches, excluding all chains and the joining slip stitch.
For its white base border, join at the upper notch. Work 3 sc into the first ch-3 arch, one sc in each of the next 6 tall stitches, one sc into the ch-1 space, 3 sc into the bottom tr, one sc into the next ch-1 space, one sc in each of the next 6 tall stitches, and 3 sc into the final ch-3 arch. Sl st into the center notch to finish. There are 23 sc around the heart, excluding that final sl st.
To add small scallops, ch 1 and turn. Across the 23 sc, work (sc in the next st, 3 dc in the next st, sc in the next st) seven times, then sc in the last 2 sts. Sl st at the notch and fasten off. Leave the upper notch visible when arranging the trim.
Step 6. Make the Pink Strap
With pink, ch 7. Work 6 sc starting in the second chain from the hook. Ch 1 and turn. Continue in rows of 6 sc to your preferred length. Allow approximately 4 cm / 1½ in at each end for the attachment tabs. For example, a 78 cm strip leaves about 70 cm exposed after both tabs are attached.
Let the strap relax before measuring. Cut nonstretch woven tape to the relaxed length. Turn under its ends and stitch it to the underside of the strap along both long edges. Keep the tape slightly narrower than the crochet so it is concealed from the front.
Assembly and Finishing
Attach the Red Heart
Center the small heart on the front panel with its point facing down. Pin it with the bag panel lying flat. Sew around the base border, keeping the white scallops free. Secure the yarn tails on the wrong side before adding the lining.
Join the Gusset
With wrong sides facing each other, align the red strip’s first short end with one opening marker. Whipstitch one long row-end edge to the pink panel’s lower edging, traveling around the bottom point and finishing at the opposite marker. Pin the ends and point first, then distribute the remaining length evenly. Do not stretch one piece to fit the other.
Pin the back panel to the remaining long edge of the red strip. Match its markers and bottom point to the front. Sew this second seam, leaving both upper lobe sections free. The gusset’s short ends remain the two sides of the opening.
Add the White Outer Trim
Join white to a pink edging stitch near the center notch on the front. Work one bobble in the next edging stitch and sc in each of the following 2 edging stitches. Repeat that three-stitch sequence around the front, working into the pink edging just outside the seam. Finish any one or two leftover stitches with sc and sl st to the start.
If the trim crowds the notch, use plain sc for a few stitches there. Keep the bobbles on the outside of the heart and leave the red strip free of trim. The back may keep its plain pink edge to sit comfortably against clothing.
Line the Bag
Before sewing the lining, trace the finished pink panel on paper. Add a 1 cm / ⅜ in seam allowance around it and cut two fabric hearts. Measure the actual gusset depth and the lower seam path, then cut a fabric gusset strip with 1 cm seam allowance on every edge.
Sew the fabric gusset to the lower edges of the fabric hearts, matching the same opening endpoints as the crochet shell. Leave the upper lobes open. Insert the lining with the fabric’s right side visible inside the bag and the seam allowances facing the crochet. Turn the opening allowances under, clip the allowance at the notch carefully without cutting the seam line, and hand-stitch the fabric to the inside of the crochet opening. Check the opening with the intended contents before securing the final stitches.
Secure the Strap and Closure
Center one strap end over each side of the opening, with the reinforcing tape facing inward. Place each 4 cm tab down the inside wall. Sew through the tape, crochet, and a reinforcing fabric patch behind the lining. Make a rectangle of stitching with a diagonal across it, then repeat at the other side. The trim should remain free of the attachment stitches.
For a simple closure, sew one half of a small snap to the lining behind the front center notch and the matching half behind the back notch. Reinforce the fabric behind both halves. Close the empty bag to confirm alignment before finishing the second half.
Final Checks
- The lining sits smoothly and does not pull the upper lobes inward.
- The gusset ends align and the bottom point sits centrally.
- Both strap tabs are reinforced through fabric and tape.
- The opening admits your chosen contents, the snap closes, and the strap hangs evenly.
- The white bobbles remain clear of the opening and strap stitches.
Troubleshooting
| Issue | Adjustment |
|---|---|
| The lower heart leans to one side. | Check that every lower row has two increases, one in its first stitch and one in its last stitch. |
| One lobe is larger. | Count the two 20-stitch starting groups and check the plain 18-stitch Row 23 on both lobes. |
| The gusset twists. | Unpin it and match the start, point, and finish again before distributing the intervening edge. |
| The white trim curls inward. | Loosen the bobble tension and keep its securing ch-1 free. Test a small section with three plain sc between bobbles if the trim remains crowded. |
| The strap grows longer. | Check the reinforcing tape and its end attachments. Refit the tape at the relaxed strap length. |
| The snap pulls the opening out of shape. | Release it and reposition it with the bag empty and the lining resting naturally. |
Care and Color Variations
Follow the yarn and lining care instructions. Spot-clean first, reshape the heart while damp, and dry it flat with the strap supported. Avoid hanging the wet bag by its strap. Keep contents light and inspect the strap seams periodically.
For a strawberry-inspired palette, keep the pink panels and use a deeper berry red for the center heart. A cream-and-chocolate version uses the same written construction. Keep the gusset and panel yarn weights matched when changing colors.
Frequently Asked Questions
Is this the exact pattern used in the reference photo?
This is an original interpretation of the visible heart shape, colors, and decorative trim. The photo alone does not establish its stitch counts, materials, or original construction.
Can a beginner make this bag?
The stitches are approachable, but the shaped lining, gusset fitting, and reinforced strap require careful assembly. It is best suited to someone comfortable counting rows and sewing crochet pieces together.
Can I skip the lining?
The pattern is designed with a lining to support its opening and attachment points. Include it if you plan to carry a phone or keys.
How do I make a longer crossbody strap?
Measure a comfortable strap on yourself, then add both attachment-tab allowances. Crochet and reinforce the longer strip using the same six-stitch width. A longer strap will need more pink yarn and tape.
Will the finished bag fit my phone?
Check the width, height, and opening against your phone before making the second panel. The curved upper edges and lower point reduce usable space compared with a rectangle of the same overall size.